Creating a new booking
When using PHCloud, you can create bookings for various types of travel,
including one-time or infrequent trips between different locations.
These bookings commonly involve events such as weddings, airport
transportation, or any other occasion that requires sporadic travel.
However, if you need to manage regularly scheduled travel, such as
school runs or recurring events, it may be more suitable to utilize the
Contacts feature.

Please note that any information entered will be lost if you do not
click the "Save" icon. Ensure to save your data to avoid losing any
inputted information.
To begin, open PHCloud and navigate to the bookings page. Once there, click on 'Add Booking'.
Customer Information
In PHCloud, you have two methods for adding customer information to a
booking: Non-account customers and existing customers. By maintaining a
database of frequent customers, you can select their
details when creating a booking, saving you time and effort.
Add non account customer:
Fill out the customer details fields. The required fields include:
- First Name
- Last Name
- Phone
Existing Customer:
Start typing the customer's name, and then click them from the drop down
Alternatively, click thebutton to view all your customer contacts.
To see steps on how to add a new customer to your database, please click [Here]
Booking Information:
The following information depends on your specific setup for private hires and the number of passengers you are transporting:
- Pax: The number of passengers you will be transporting.
- Deposit: The deposit amount required for this booking.
- Balance due: The date by which the balance must be paid. This date appears on all confirmations and contributes to Aged Debtors reports, allowing you to easily identify customers with outstanding balances.
- Vehicle Type: The type of vehicle to be used for the journey. Vehicle types are configured within Settings -> Vehicle Types.
- Luggage: Any limitations on luggage.
- Category: The category of booking. These categories are also defined within Settings -> Bookings.
- Description: A short description to easily identify the booking in the diary view.
Job
This is where you setup the details of your job. For further information on how to setup a job, please click [here]
Additional Job Information
In the "Additional Job Information" section, you can specify details
specific to a single coach on the booking. This feature is particularly
useful when you have multiple vehicles transporting passengers for the
same booking.
- Pax - The number of passengers being transported as part of this job
- Nominal Code - The nominal code being used for the finances relating to the payments
- VAT Code - The VAT code for the finances relating to the payments
- Vehicle - Choose the vehicle that will carry out the transportation. You can also set this up from the Diary view.
- Driver - Assign the driver who will be operating the coach. This can also be set up from the Diary view.
- Vehicle Type - Indicate the type of vehicle being used for this journey. To add additional vehicle types, go to Settings -> Vehicle Types.
- Luggage - Select the type of luggage that has been agreed upon with the customer.
To add additional luggage types, go to Settings -> Luggage
Requirements.
Extras
In this section, you can assign separate job extras, typically as ad-hoc
options. This feature allows you to customize and edit your bookings to
meet your clients' unique needs. For example, you can set up charges
for baggage collection, specific baggage types, and more.
To add a new job extra, click on .
.
To add a new job extra, click on
This will open a popup window with several options
Field names in green signify that they are a mandatory field.
- Details - The name of the job that is to be carried out
- Quantity - The quantity of the item that has been purchased
- Unit Price (Excluding VAT) - The amount that the item was purchased for
- Unit Cost (Excluding VAT) - The amount that the item is being sold for
- Nominal Code - A nominal code to organize transactions for accounting purposes.
- VAT Rate - A VAT Rate selector, to define if the job extra has a typical 20% VAT rate, a lower VAT rate, or is VAT exempt
- Notes - An additional field for any additional notes that you want to attach to this job extra
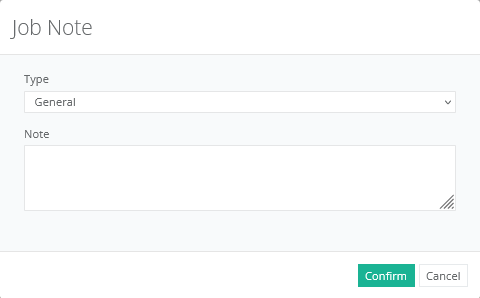
Notes
Adding job notes helps you keep track of specific requirements or other information related to a booking.
To add a Job note, click
Select the type of note, and if the note is visible to the customer themselves (General), the driver (Driver), or only internally within your company (Internal)
Type into the 'Notes' field, and then press 'Confirm' when finished.
To add a Job note, click
Select the type of note, and if the note is visible to the customer themselves (General), the driver (Driver), or only internally within your company (Internal)
Type into the 'Notes' field, and then press 'Confirm' when finished.
If you have any other questions about the above, please do not hesitate to contact our support team, who will be happy to help.
Mon-Thu - 0900 - 1730
Friday - 0900 - 1700
T: 01302 841333
Related Articles
Creating a new job
Job Creation 1) Setting your start and finish points To begin, set your intial start and finish points for each coach. This can be done via two different methods, depending on your requirements: Selecting from Depot Select from the dropdown box, a ...PHCloud - Driver Application
` PHCloud Driver Application - First Use Here you will find all the steps required to configure your system plus the brand new PHCloud Mobile App with Walkaround and Diary functionality. Please take time to have a ...Drivers App - t4 Tours Link
PH Cloud & Drivers App - t4 Tours Link A new feature available in t4, allows any tour created to be automatically added into PH Cloud, Roeville's cloud based Private Hire software platform. This is a real time link that allows the operator and driver ...Adding Vehicles and Drivers
How to add and manage vehicles and drivers This article will show you how to quickly add your vehicle fleet and drivers into PHCloud. Once added, both drivers and vehicles can then be assigned at the booking process or within the diary. In addition ...Unable to Save a Booking - 'Times must be in chronological order'
If you see the error message 'Times must be in chronological order' in the PHCloud application, it means there is a conflict between the timing of the route and the position of the coach not being possible for the coach to carry out. To resolve this ...